這篇算是寫給自己看的紀錄,雖然 nodeJS 應該不會是製作爬蟲的首選,不過做一些簡單的小工具就不用太講究了。
爬蟲準備 雖然不是重點,但還是得先要有爬蟲的程式才能繼續下去,這次爬蟲的受害者依舊是中央氣象局,我們簡單的用爬蟲去取得今天台北市的天氣狀況,程式如下:(再次提醒,爬蟲會造成對方伺服器負擔,請勿頻繁的擷取資料)
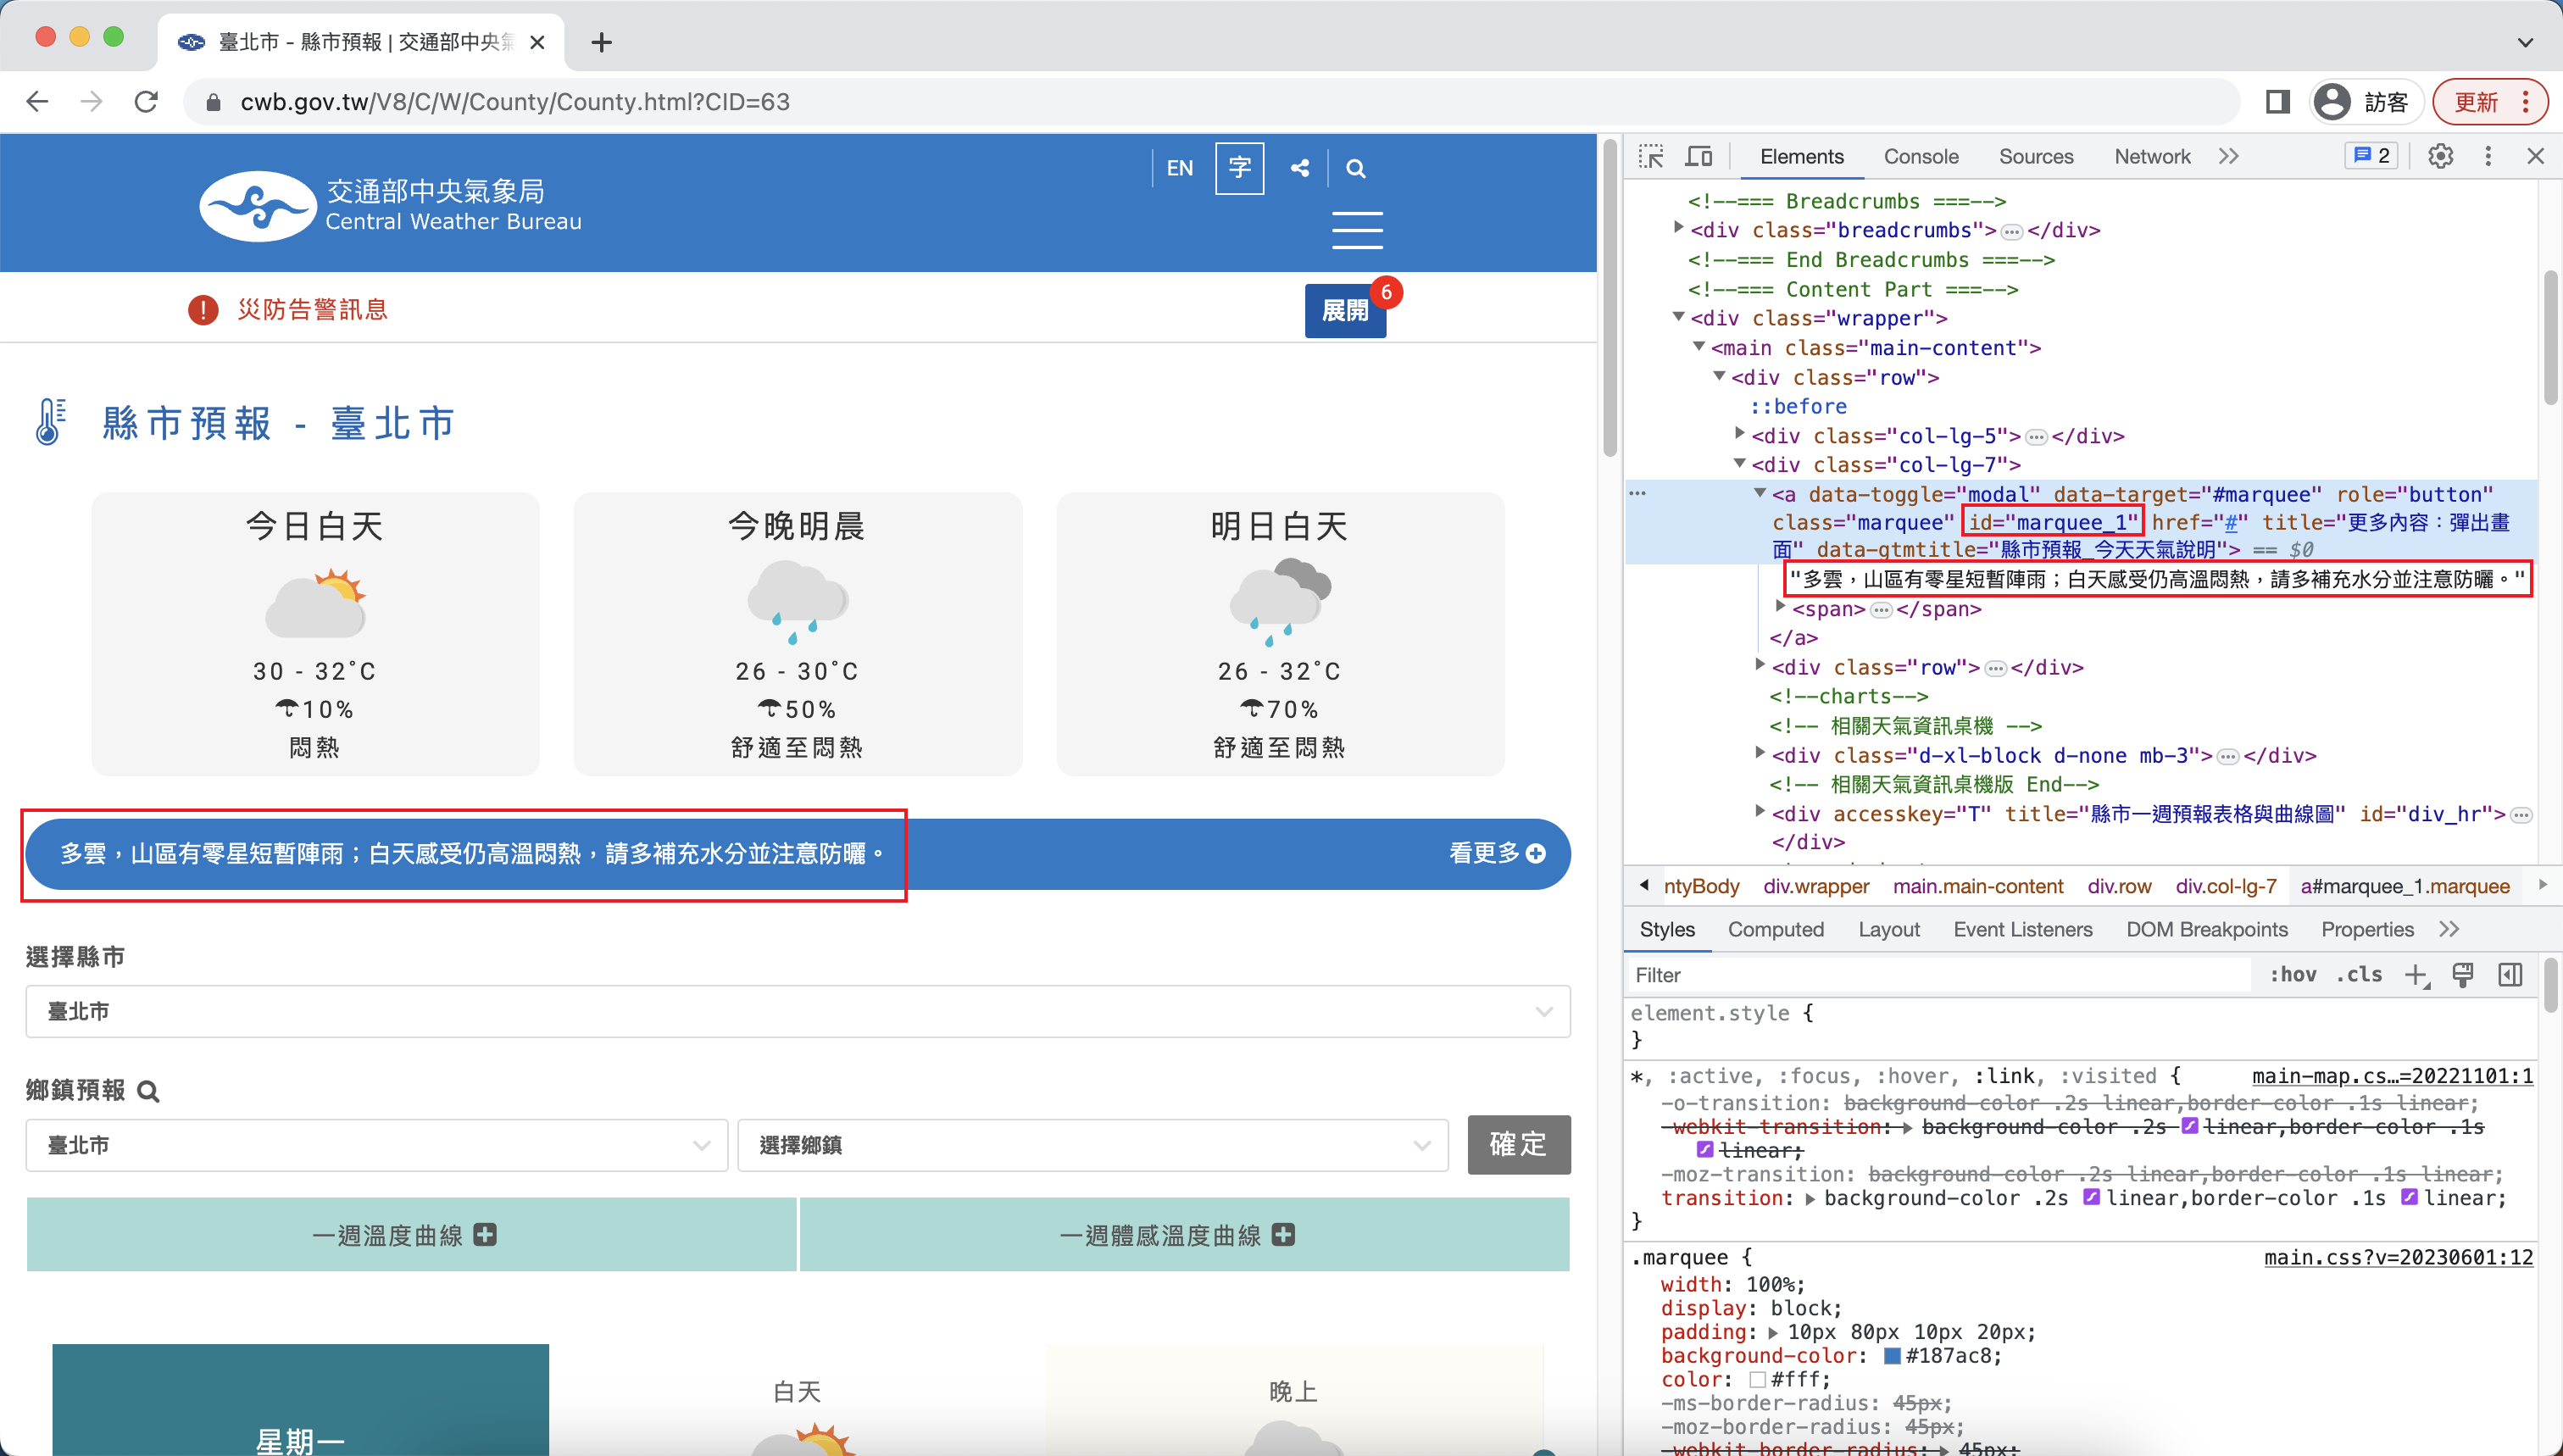
取得這塊跑馬燈的文字內容
1
2
3
4
5
6
7
8
9
10
11
12
13
14
15
16
17
18
19
20
const puppeteer = require ("puppeteer" );const cheerio = require ("cheerio" );enterPage ("https://www.cwb.gov.tw/V8/C/W/County/County.html?CID=63" );async function enterPage (url ) { const browser = await puppeteer.launch ({ args : ["--no-sandbox" ] }); const page = await browser.newPage (); await page.goto (url); try { const html = await page.content (); const $ = cheerio.load (html); console .log ($("#marquee_1" ).text ()); } catch (e) { console .log (e); } await browser.close (); }
在本機上執行結果
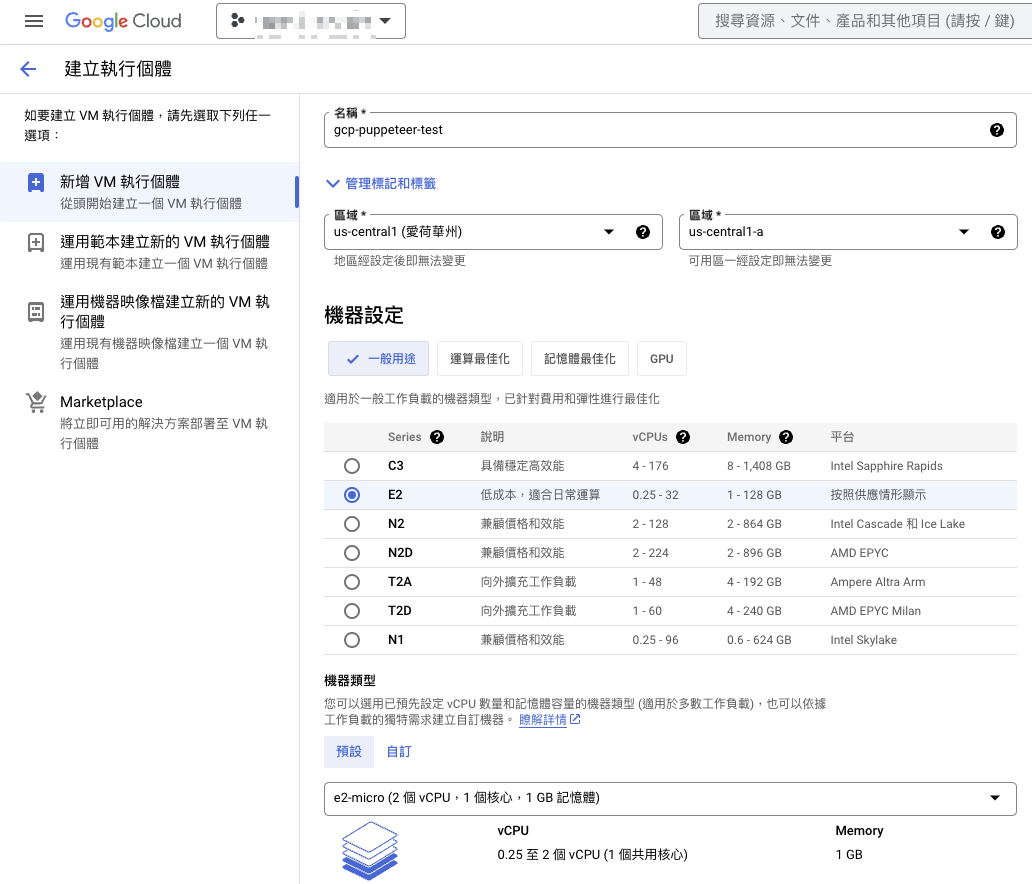
開機器 開免錢的就好 系統用ubuntu,隨個人喜好就好
設定環境 機器開好後直接 ssh 連進去,首先先來安裝 nodejs
1
2
curl -fsSL https://deb.nodesource.com/setup_20.x | sudo -E bash - &&\ sudo apt-get install -y nodejs
接著安裝一些 chrome 的相關套件
1
2
sudo sudo apt update sudo apt-get install ca-certificates fonts-liberation libappindicator3-1 libasound2 libatk-bridge2.0-0 libatk1.0-0 libc6 libcairo2 libcups2 libdbus-1-3 libexpat1 libfontconfig1 libgbm1 libgcc1 libglib2.0-0 libgtk-3-0 libnspr4 libnss3 libpango-1.0-0 libpangocairo-1.0-0 libstdc++6 libx11-6 libx11-xcb1 libxcb1 libxcomposite1 libxcursor1 libxdamage1 libxext6 libxfixes3 libxi6 libxrandr2 libxrender1 libxss1 libxtst6 lsb-release wget xdg-utils
然後將我們寫好的爬蟲檔案跟 package.json 上傳,並且移到目標資料夾內
1
2
3
4
5
6
7
8
9
10
11
12
{ "name" : "gcp-puppeteer-test" , "version" : "1.0.0" , "description" : "" , "main" : "index.js" , "author" : "" , "license" : "ISC" , "dependencies" : { "cheerio" : "^1.0.0-rc.12" , "puppeteer" : "^20.8.0" } }
在專案資料夾底下新增一個檔案 puppeteer.config.cjs,並輸入以下內容後存檔離開
1
2
3
4
5
6
7
8
9
const {join} = require('path'); /** * @type {import("puppeteer").Configuration} */ module.exports = { // Changes the cache location for Puppeteer. cacheDirectory: join(__dirname, '.cache', 'puppeteer'), };
然後執行 npm install 安裝套件,套件安裝完成後就可以執行程式了,我的爬蟲檔案叫 weather.js,因此就執行
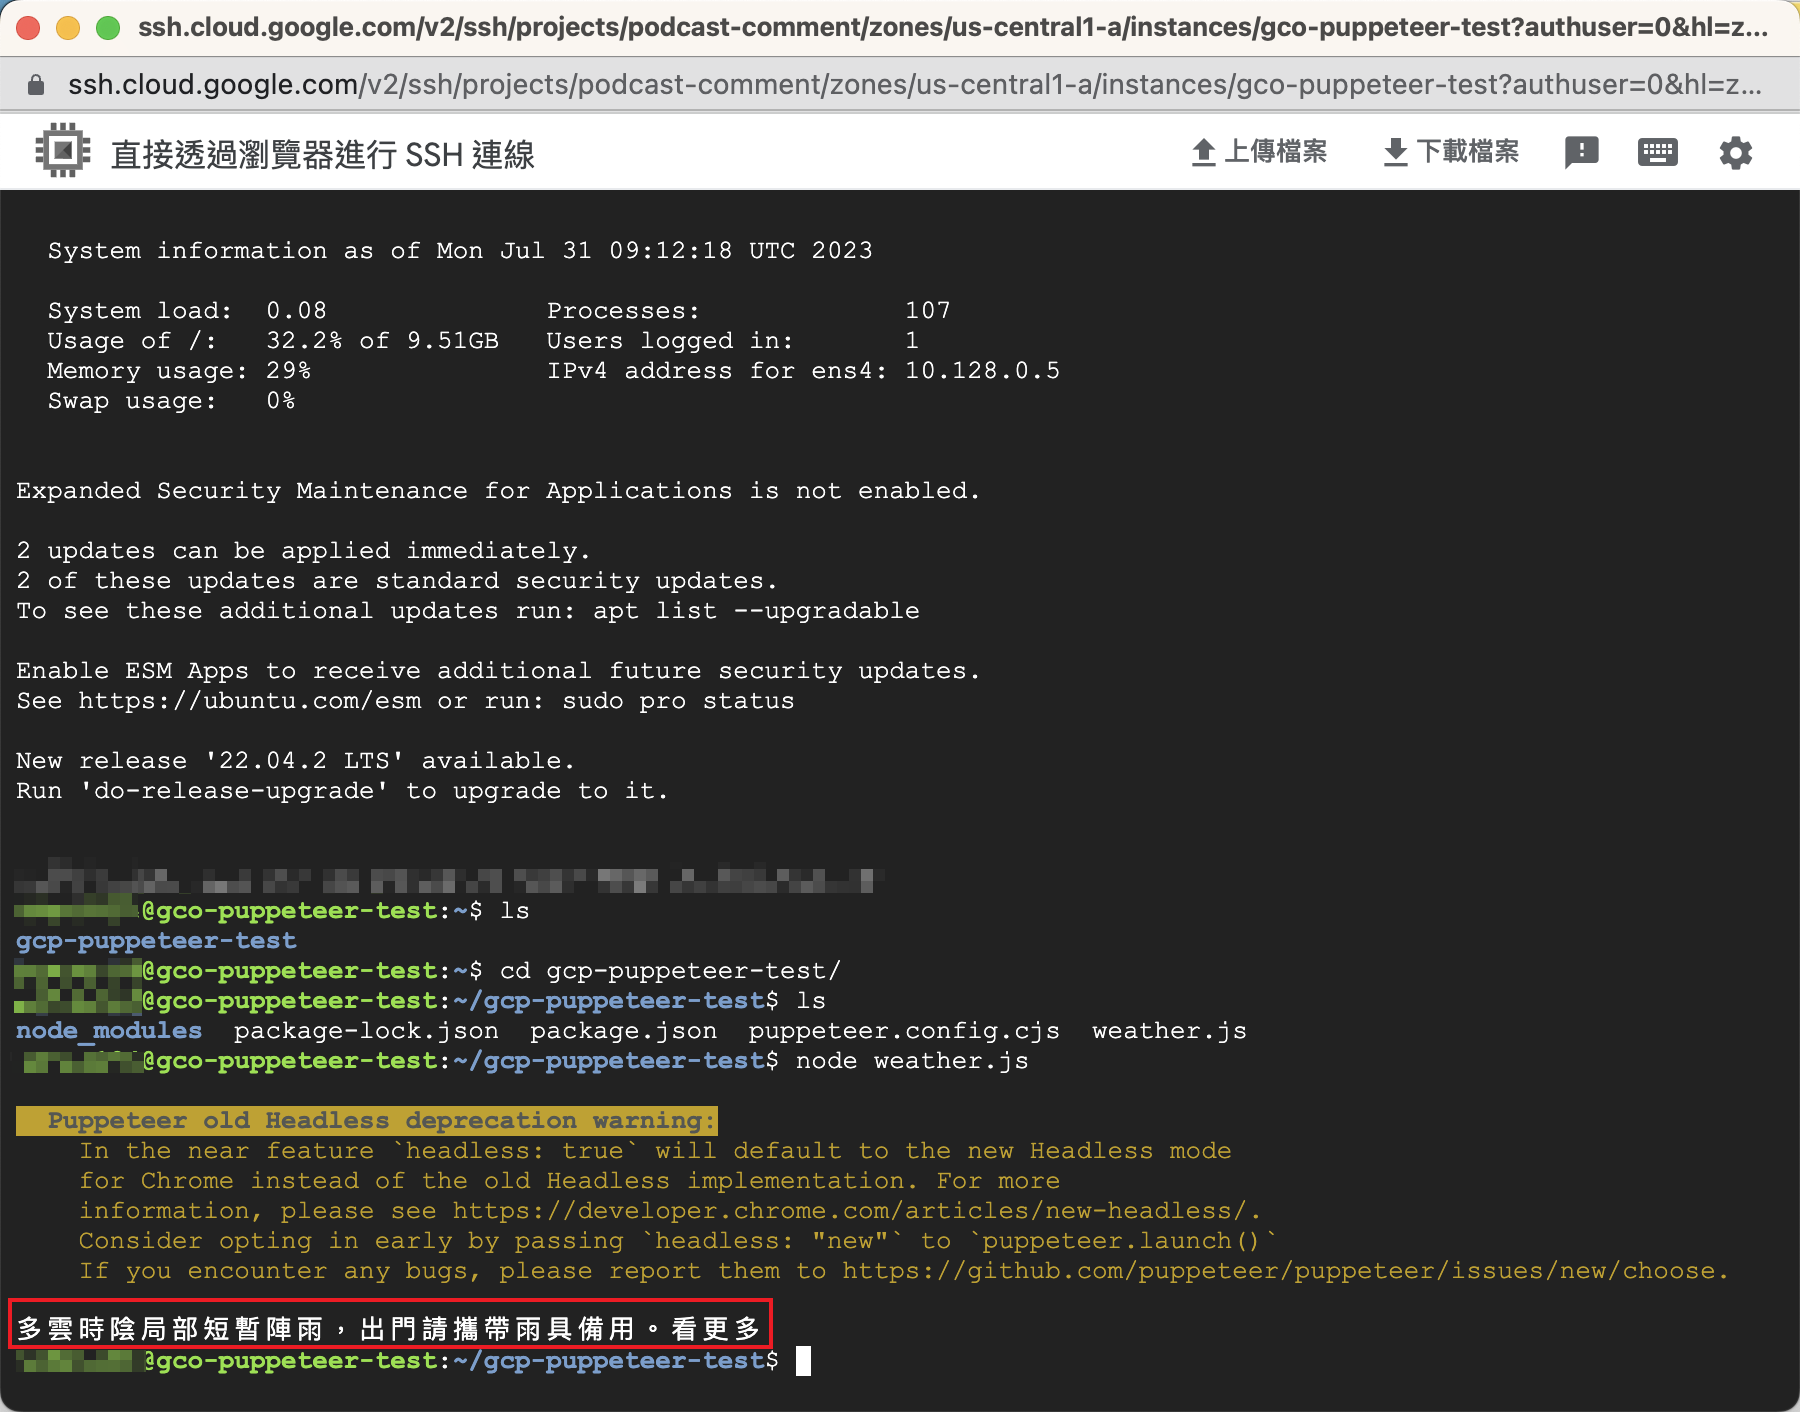
萬事具備,成果揭曉
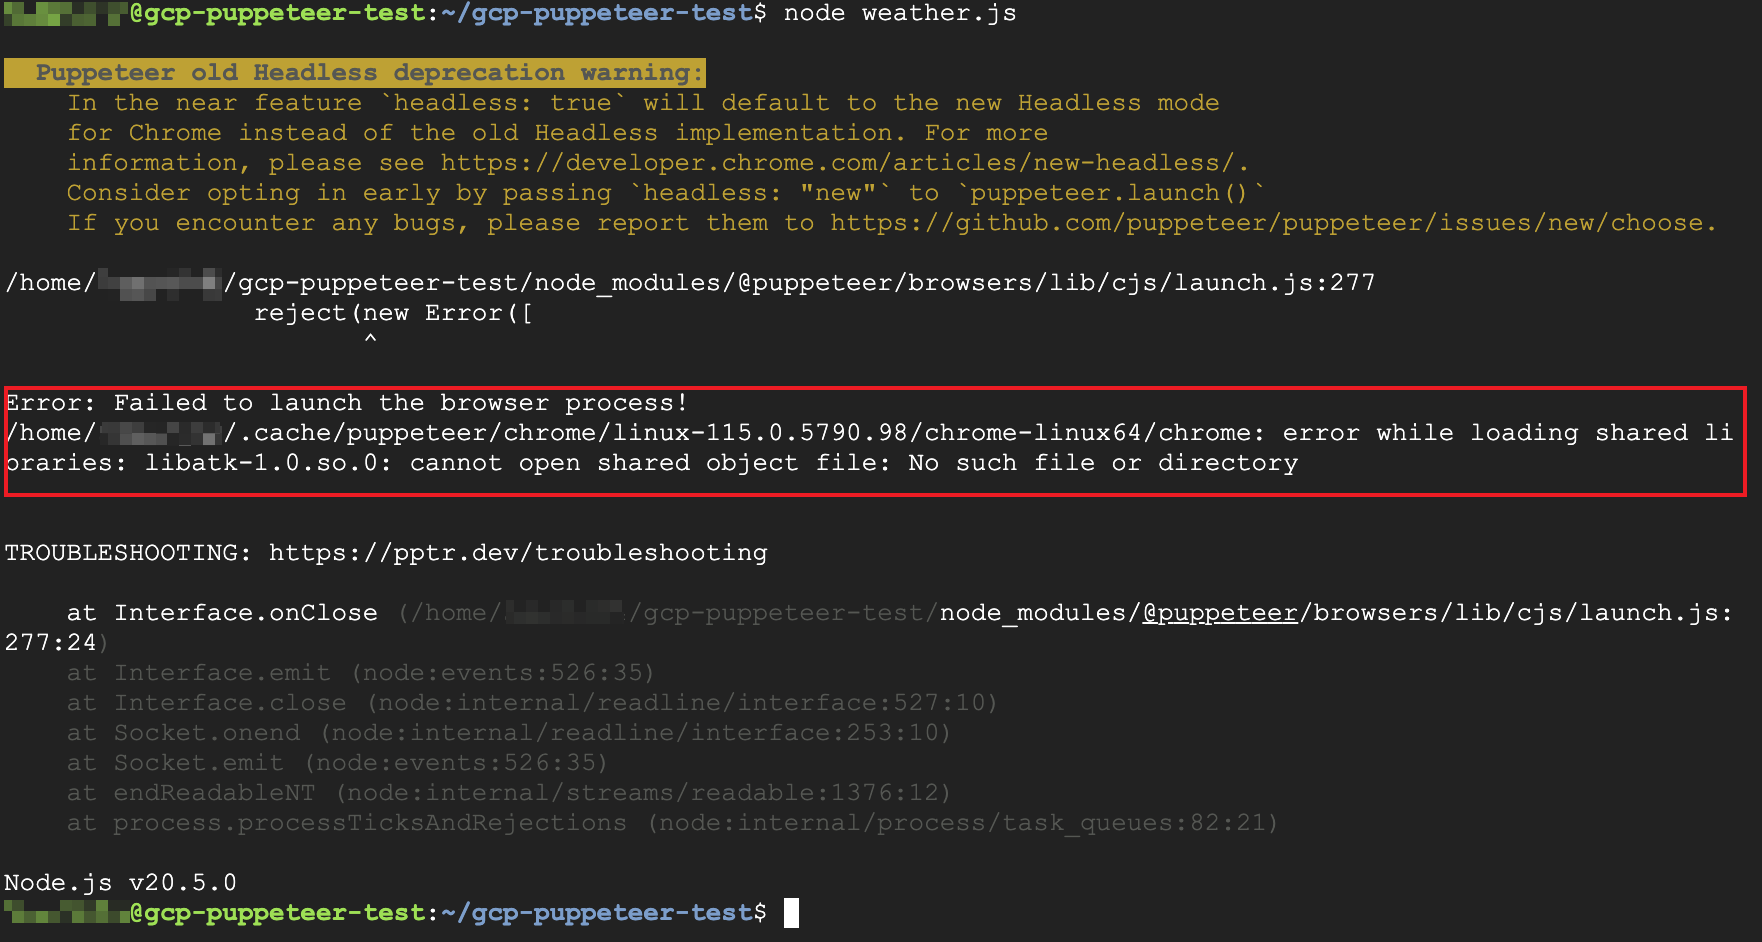
後記 如果在執行程式的時候出現錯誤,比方說出現 Error: Failed to launch the browser process!,那應該是漏了前面安裝 chrome 相關套件的原因,但我這篇的流程是完全開一個新 vm 來測試的,所以照著順序做就能夠成功,提供給有需要的做參考,這件事情也拌住了我一兩天,都差一點都想說要放棄改用 python 來寫爬蟲了呢。
 取得這塊跑馬燈的文字內容
 在本機上執行結果
 開免錢的就好
 系統用ubuntu,隨個人喜好就好
 萬事具備,成果揭曉